People pick up one of my saws and ask what the brass bit is for, or why the handle has a hook on top. Fair questions. A backsaw is a simple tool, but every part of it is there for a reason, and once you know the names it’s much easier to talk about what a saw is doing and why. So, from the teeth up.
The plate
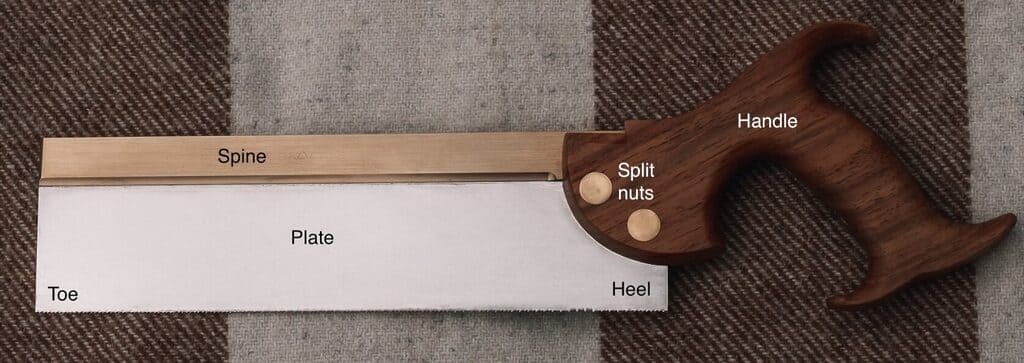
The plate is the blade, the thin sheet of steel that does the cutting. Mine are 0.5mm spring steel, hardened to between 44 and 47 on the Rockwell C scale. That’s hard enough to hold an edge and soft enough that a file will still cut it, which matters when the time comes to sharpen. A thin plate leaves a narrow kerf (the slot the saw cuts), so it takes less effort and wastes less wood. It also flexes easily, which is why a backsaw needs the next part.
The spine
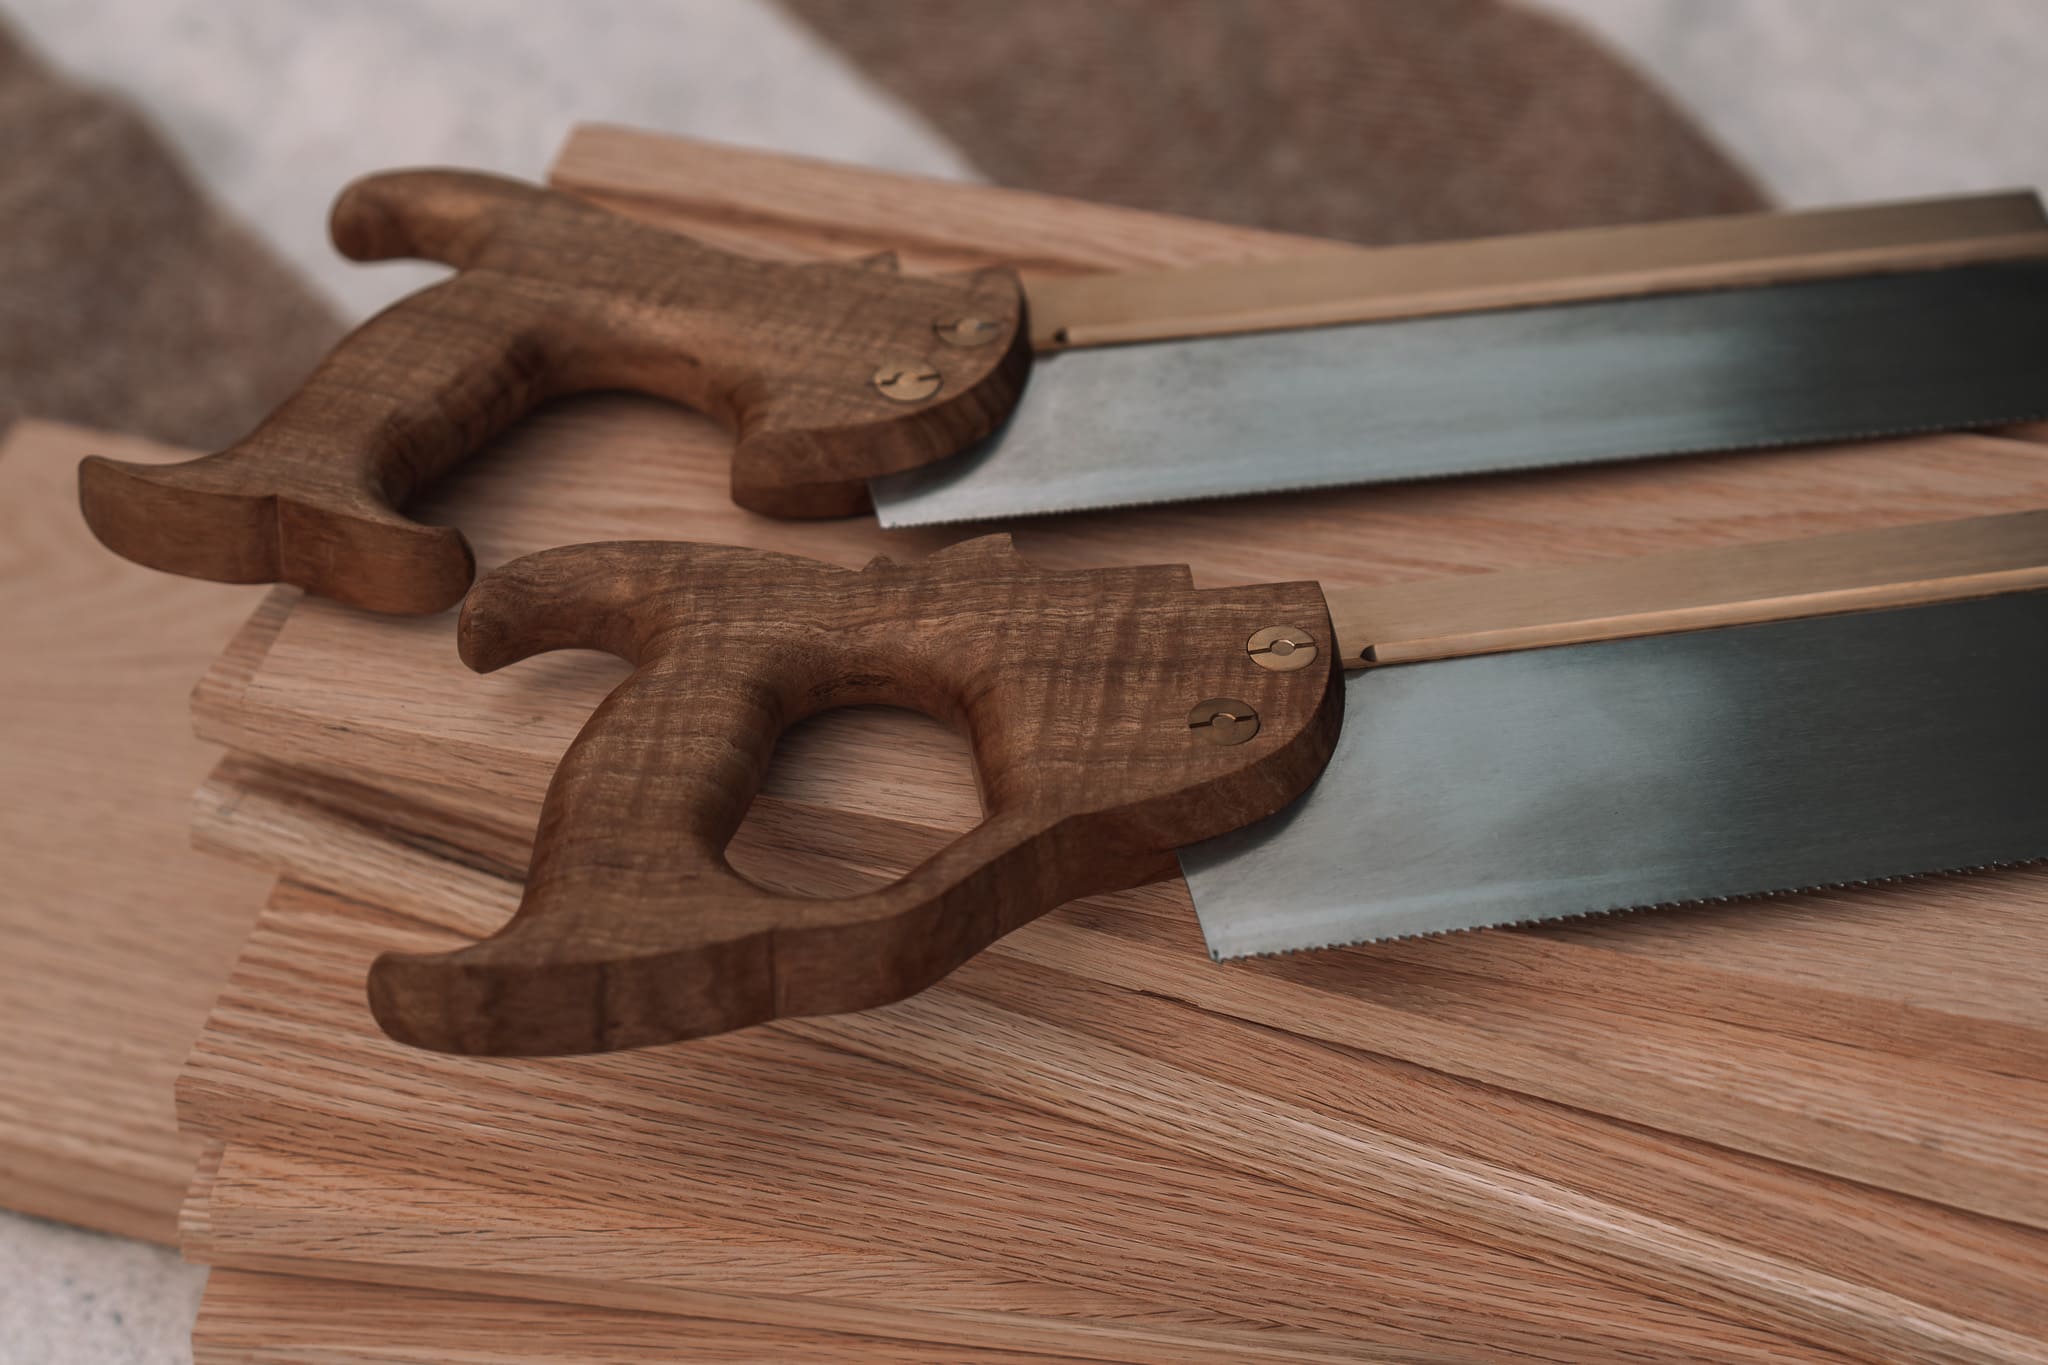
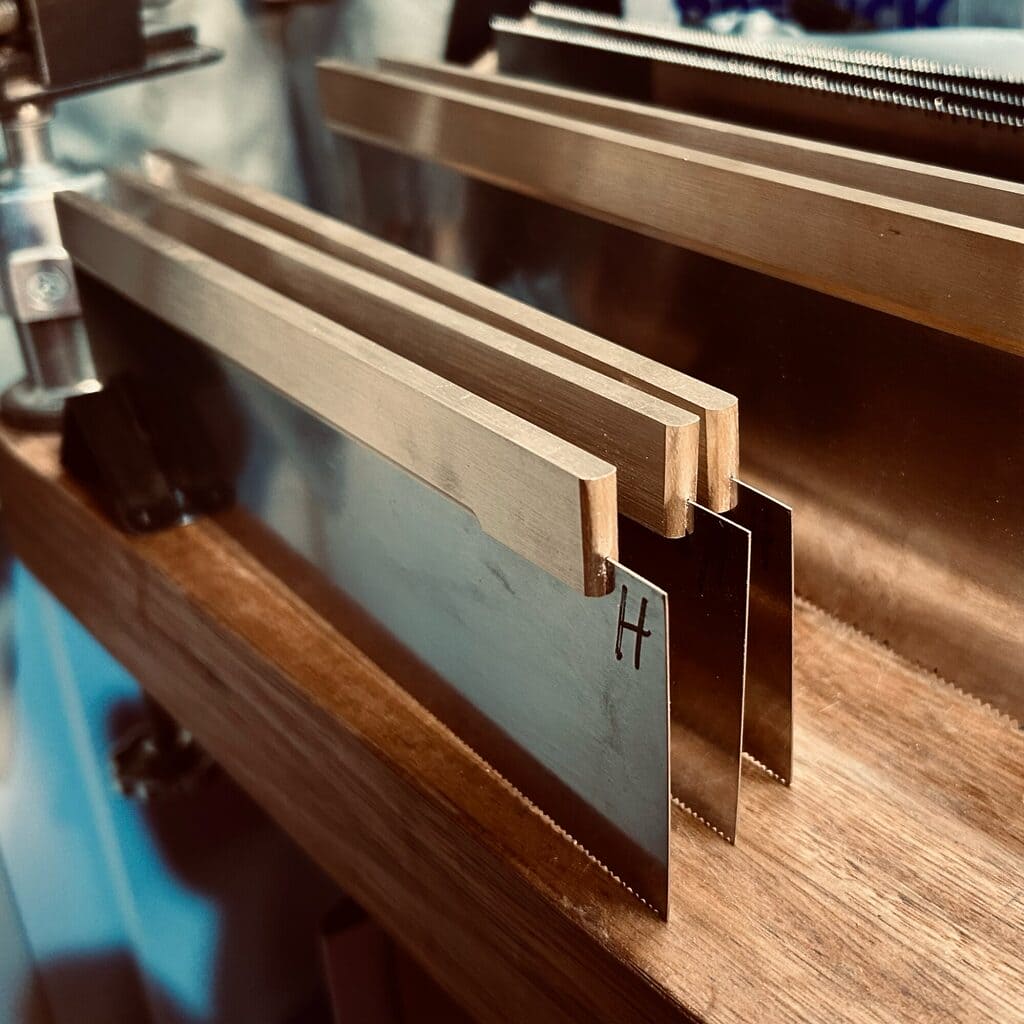
The spine, or back, is the heavy bar fitted over the top edge of the plate. It does two jobs. It holds the thin plate dead straight, and it puts weight over the teeth so the saw sinks into the cut under its own mass instead of being pushed. Mine are solid brass, which is heavy for its size and doesn’t rust. Older English saws often had steel spines, and they work too. The spines on my first batch of saws were made at HNT Gordon, and I’m a bit proud of that.
A backsaw can only cut as deep as the gap between the toothline and the spine. That’s why it’s a joinery saw and not a saw for ripping boards.
Toothline, toe and heel
The toothline is the bottom edge of the plate, the row of teeth. The toe is the far end of the plate, away from the handle. The heel is the end nearest the handle. You usually start a cut with the toe or the middle of the plate resting on the wood, and when someone says a saw is sharpened evenly they mean from heel to toe.
Teeth, gullets and set
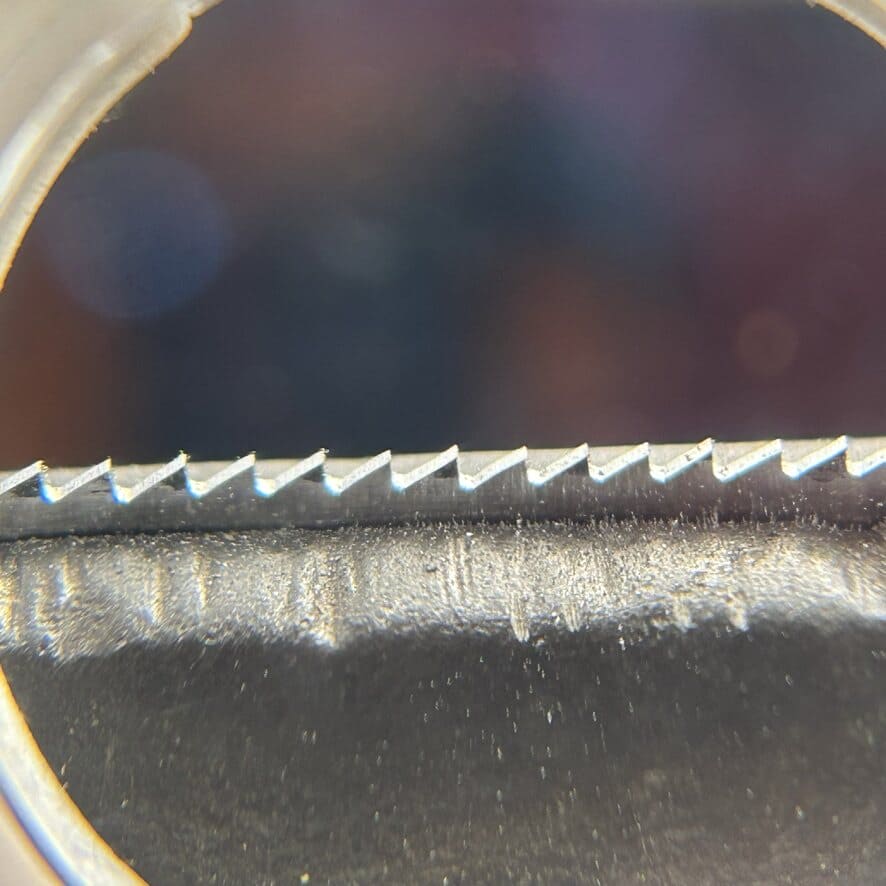
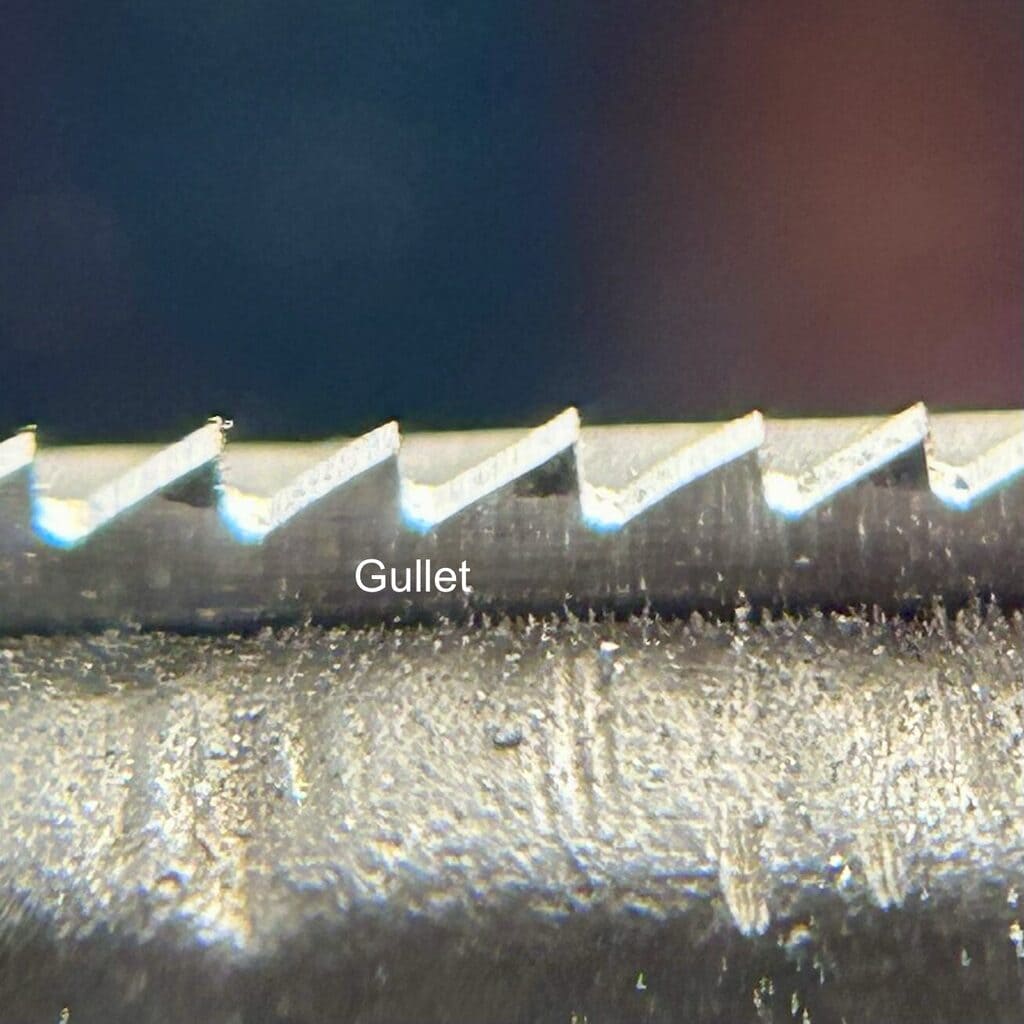
Each tooth is a small triangle filed into the toothline. The valley between two teeth is the gullet, and it carries the sawdust out of the cut. If the gullets pack with dust the saw stalls, which is one reason a coarse saw cuts faster in thick timber. Set is the slight sideways bend given to alternate teeth, one left, one right, so the kerf is a touch wider than the plate and the saw doesn’t bind. A fine joinery saw needs very little set. The angles filed into the teeth, rake and fleam, have their own post.
The handle
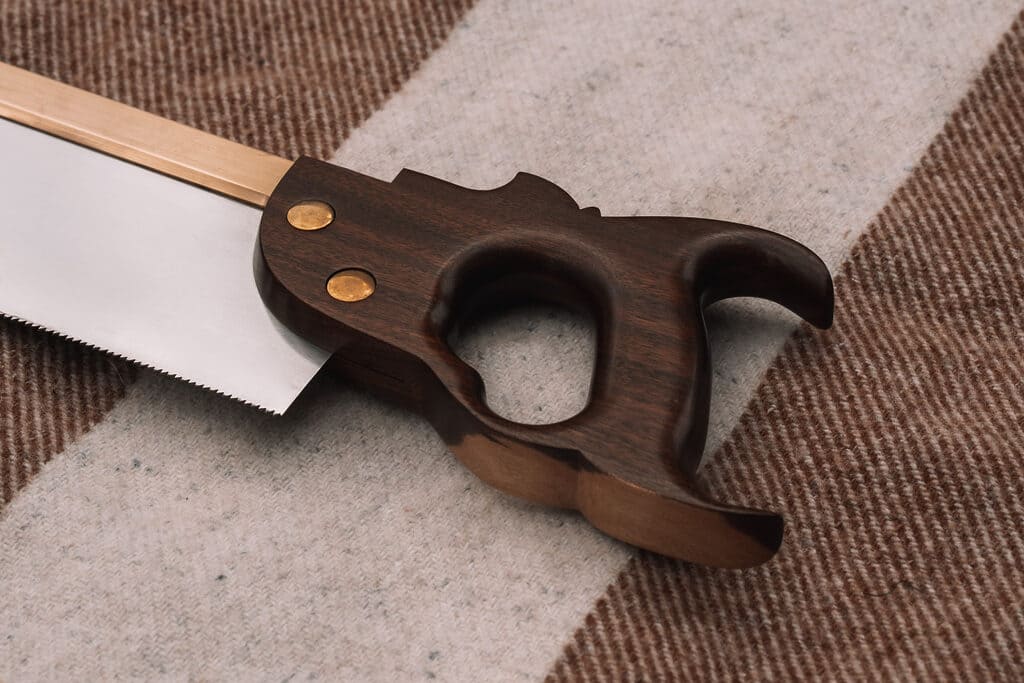
The handle is the part I spend the most time on, and the part that decides whether a saw is a pleasure to use or a chore. It’s shaped from a single block of timber, with a slot for the plate and holes for the fasteners. The names for its parts are old and a bit odd.
- The grip is the part your three lower fingers wrap around. Its size is what I cut to your hand.
- The horns are the two points at the top and bottom of the grip. The upper horn sits over the web of your thumb and stops your hand riding up. The lower horn sits under your little finger and stops it sliding off.
- The cheeks are the flat faces of the handle either side of the plate, where the fasteners pass through.
- The lamb’s tongue is the curved swell some makers carve below the lower horn. On most saws it’s decoration.
A handle that fits closes on your hand with almost no grip pressure. If you have to squeeze to stop the saw twisting, it’s the wrong size. There’s a post on how to measure your hand if you want to check yours.
Split nuts
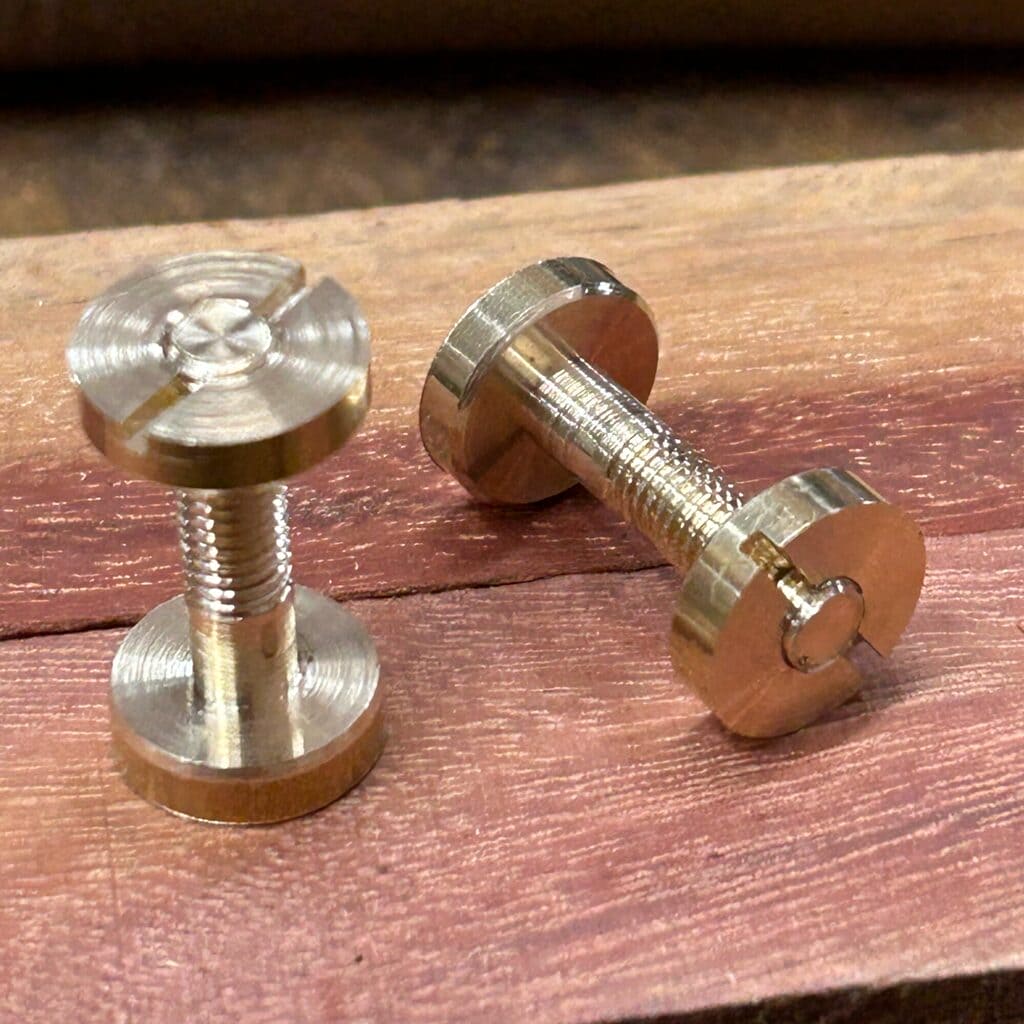
The plate is held in the handle by two or three brass fasteners called split nuts. Each one is a threaded bolt with a wide domed head on one side and a matching nut on the other. The nut has a single slot across its face instead of a hex, which is where the name comes from, and you need a screwdriver with a notch in the blade to turn it. I make my own split nuts in solid brass on the metal lathe, using what Terry Gordon taught me during my time at HNT Gordon. Split nut screwdrivers to go with them are next on my list to make.
Hang angle
Hold the saw with the teeth flat on the bench and look at the angle the grip makes with the toothline. That’s the hang. You can’t point to it, but it changes how every other part feels. A steep hang, around 40 degrees, keeps your wrist in a neutral position for a short upright stroke and makes it easy to start a cut on a small piece. My dovetail saws hang at 41 degrees. A lower hang, in the low twenties, lines your forearm up behind a longer, flatter stroke. My carcass saws hang at 23 degrees. Neither is better. They suit different cuts.
Reading a listing
Every one of the saws for sale lists plate thickness, blade length, cutting depth, spine and nut material, hand size and hang angle. Now you know what each number describes and what it’ll feel like in the hand. If anything is still unclear, ask me. I’d rather explain a saw twice than have you buy the wrong one.